How to change the Windows screen size in VirtualBox? – Ghacks
Oracle’s VirtualBox virtualization software is a popular choice for users who want to test new operating system versions. If you install Windows in VirtualBox, you may notice that you can’t change the default screen resolution of 1024×768.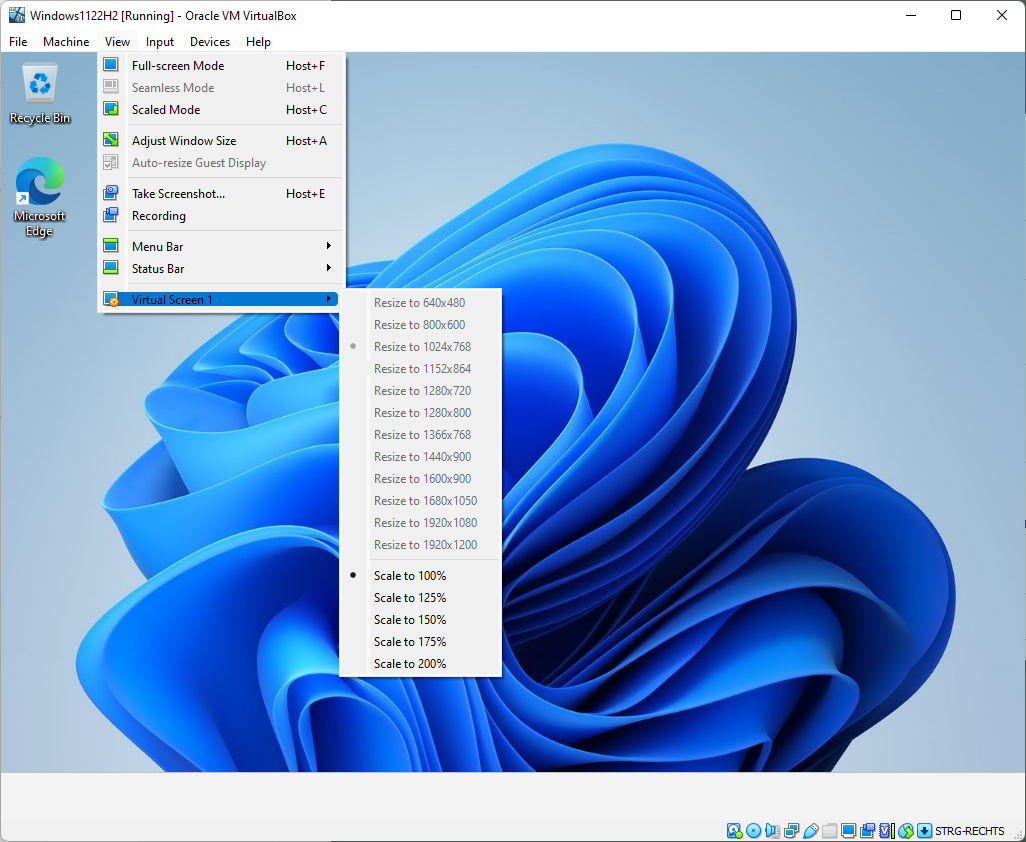
The low resolution may be sufficient for some tasks, but many may benefit from larger resolutions. The View > Virtual Screen menu of the VirtualBox application lists all available resolutions and scaling options.
The “resize to” options are all inactive, as they are grayed out and not selectable. The scaling options are unlocked and available, though.
Thankfully, it is rather easy to unlock all supported screen resolutions in VirtualBox. The following instructions explain in detail how that is done.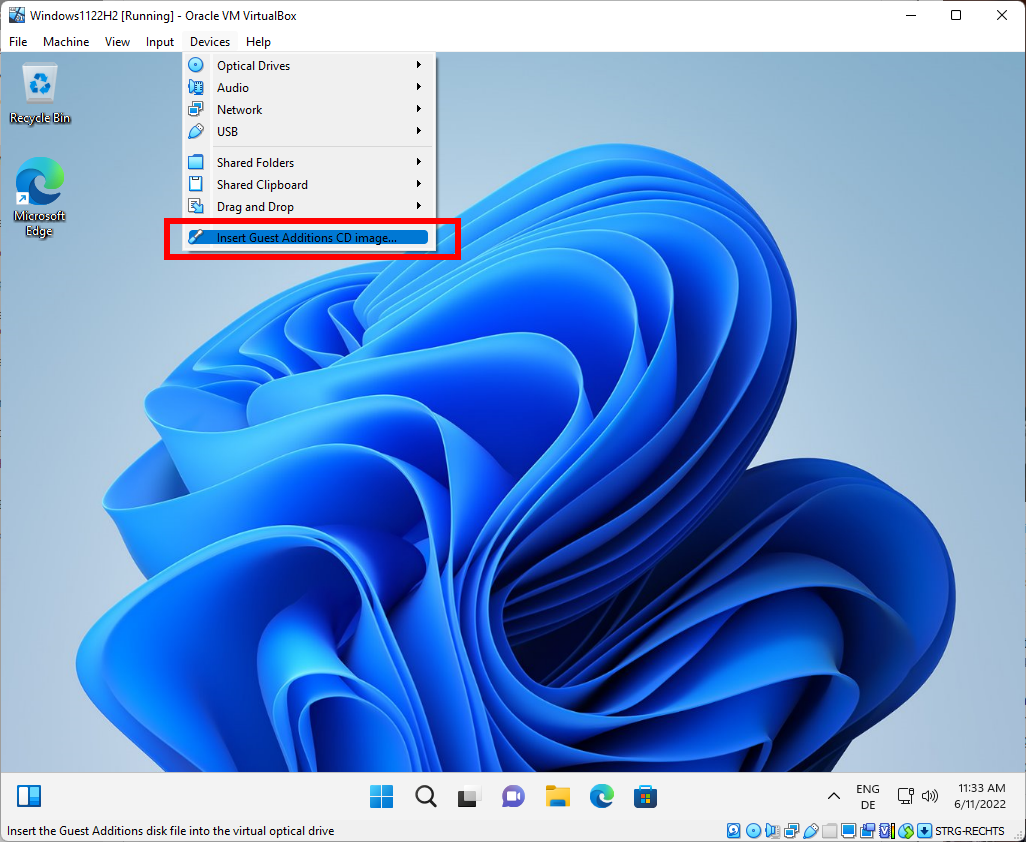
The fix requires the installation of Guest Additions; this may sound intimidating at first, but it is a straightforward process that completes in a matter of minutes on most systems. The description may sound as if you’d need to insert a CD image, but this is not the case.
To get started, select Devices > Insert Guest Additions CD image. All that it does is mount the Guest Additions CD in VirtualBox, so that you may access its contents. You will hear a sound that indicates that the CD has been mounted.
Next, open File Explorer on the system and open the the CD drive “Virtual Guest Additions”.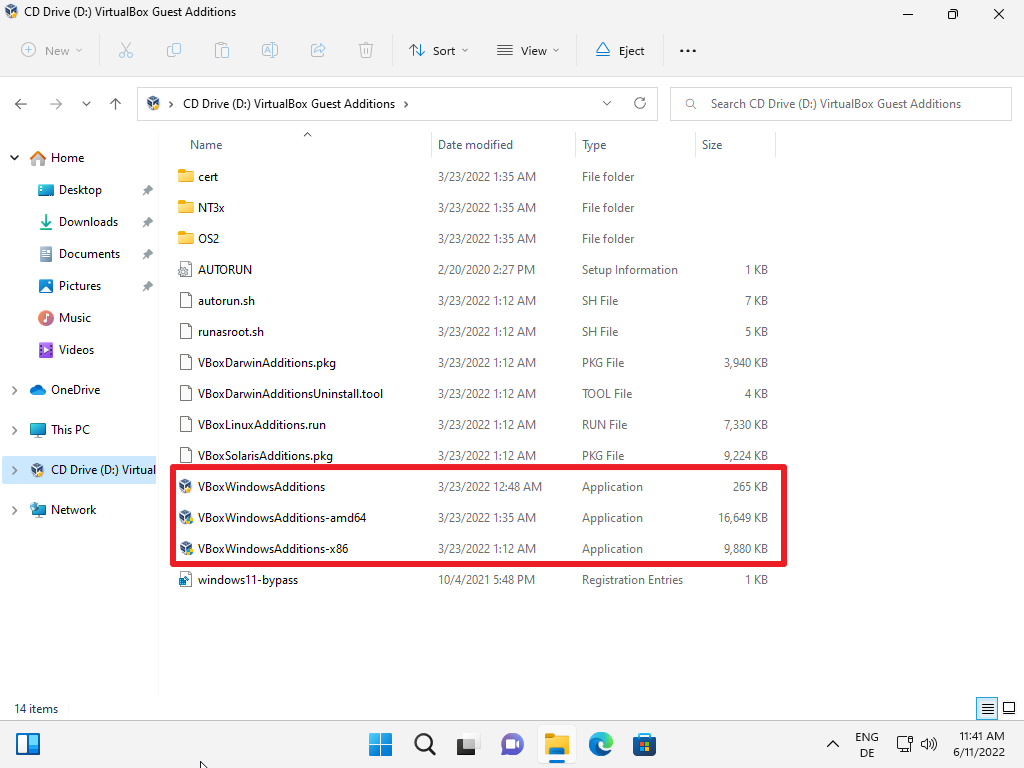
The root menu lists three guest additions for Windows. There are also additions for other operating systems, including Linux and Solaris.
The three Windows guest additions are for different architectures.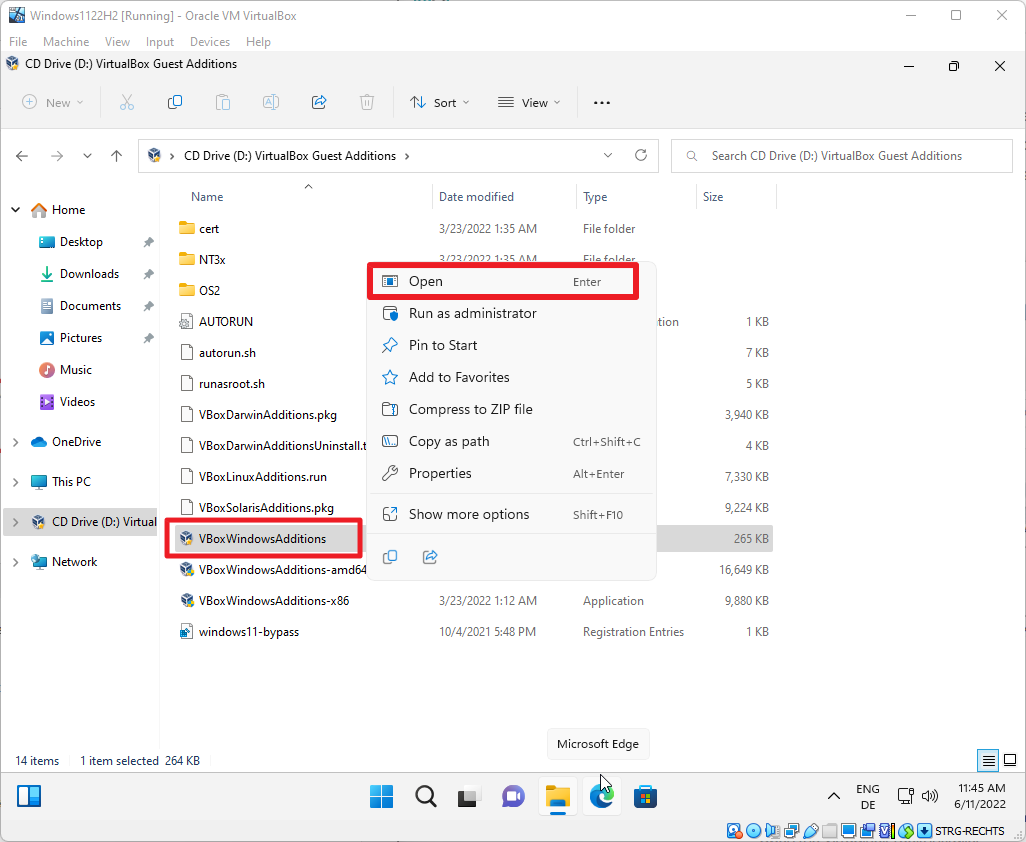
Right-click on one of the files and select open from the context menu to start the installation in the virtual machine. You may double-click on the file to start the installation.
Windows displays a User Account Control prompt, which you need to allow by selecting Yes.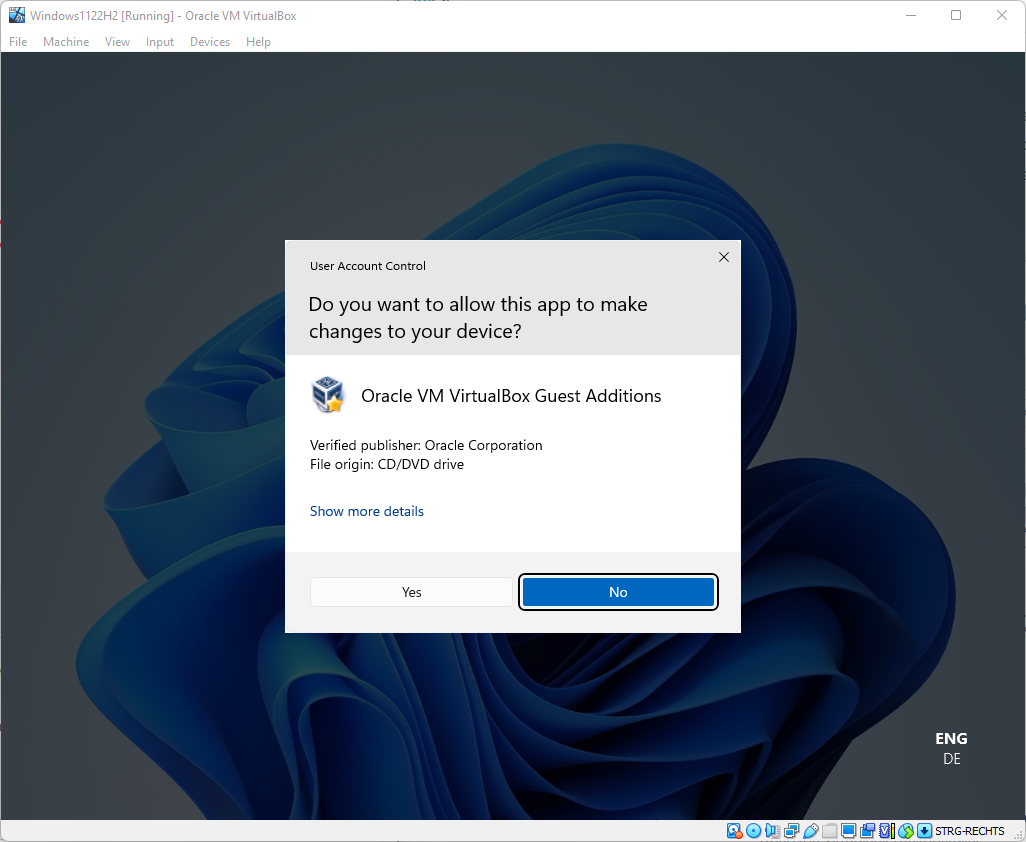
The installer launches after you have selected Yes. Select next on the first page that is displayed.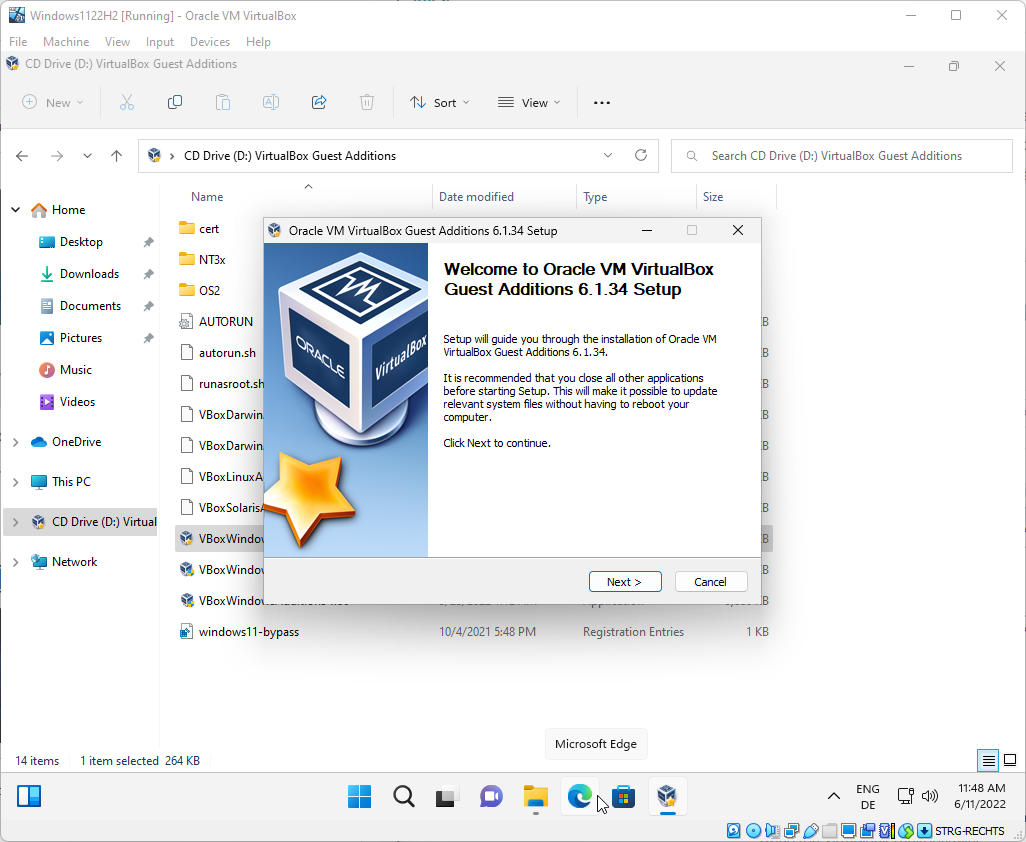
The page that follows displays the destination folder for the files that will be installed. You may change it, but most users may want to keep the default path. Select Next to proceed.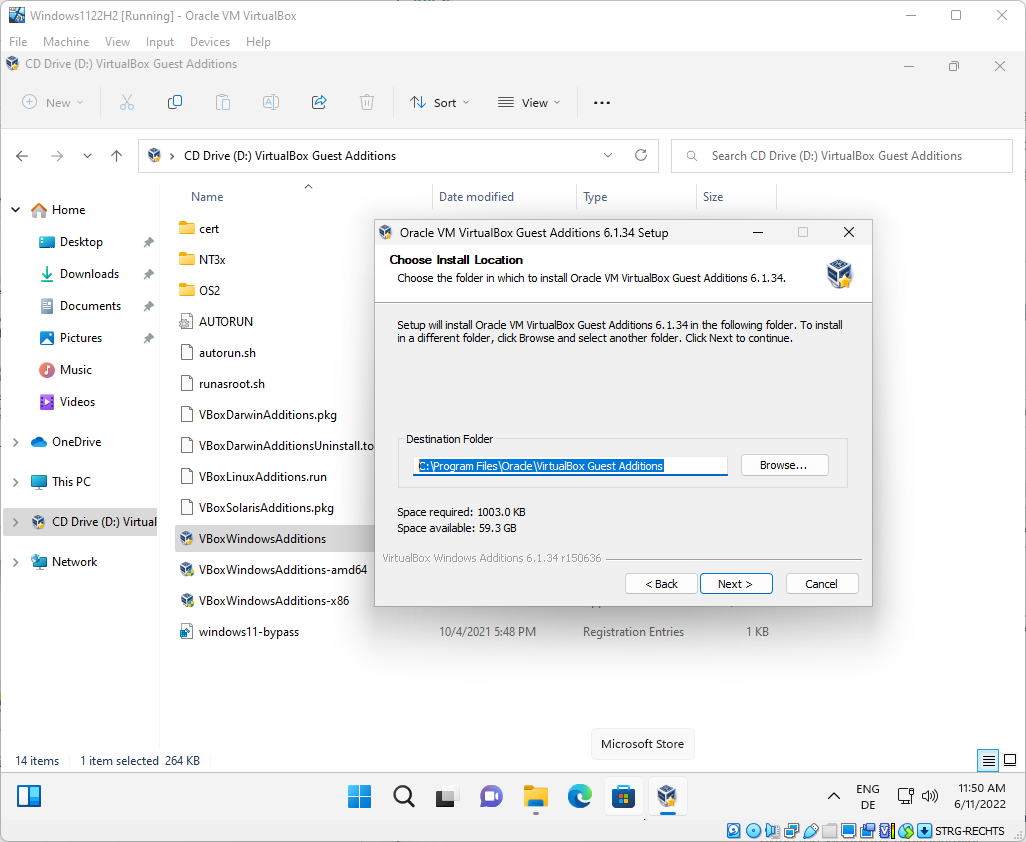
The final screen displays the components that will be installed. You may disable the creation of a start menu entry, but the two remaining components will be installed. Select the install button to proceed.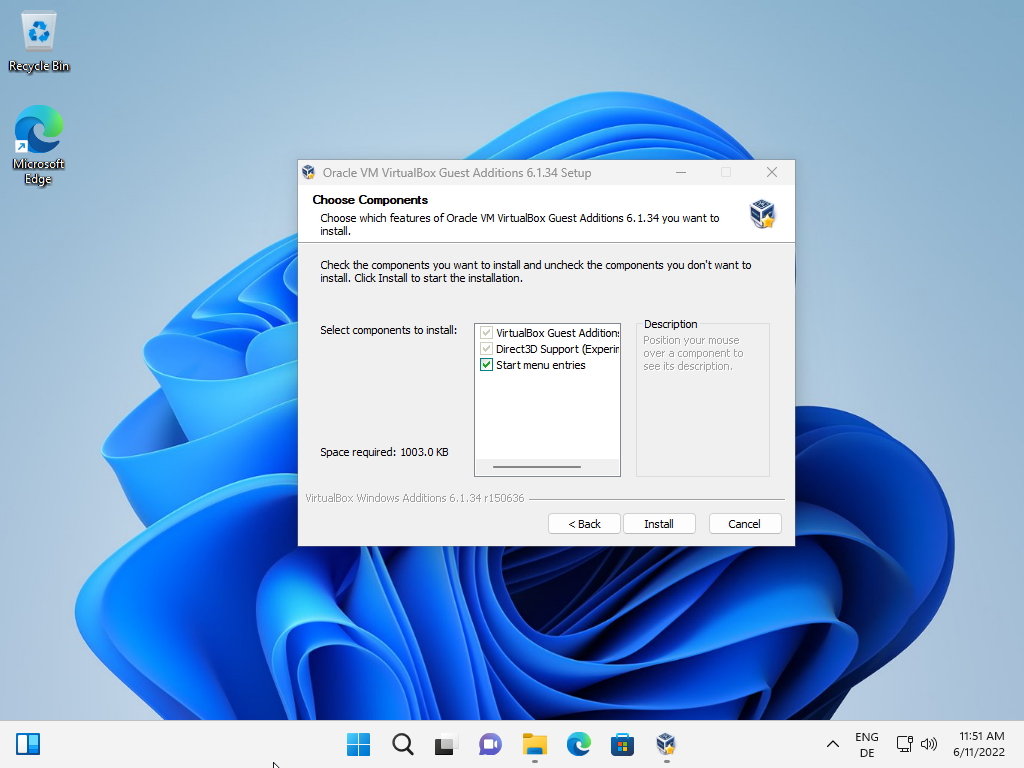
The installer displays its actions once you hit the install button.
It is necessary to reboot the virtual machine to finalize the installation. You may do so right away by selecting “reboot now”, or at a later point in time. Select finish to exit the installer.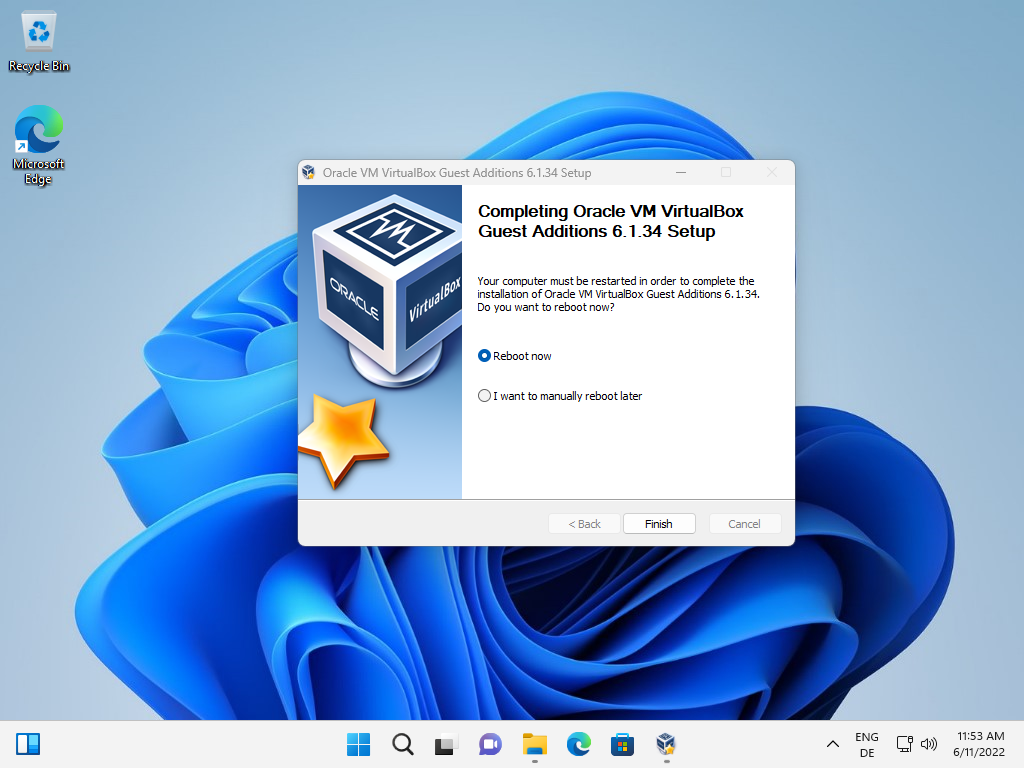
All screen resolutions are unlocked after the restart. Select View > Virtual Screen X to select a different resolution. Please note that it may take a few seconds before the resolutions become available.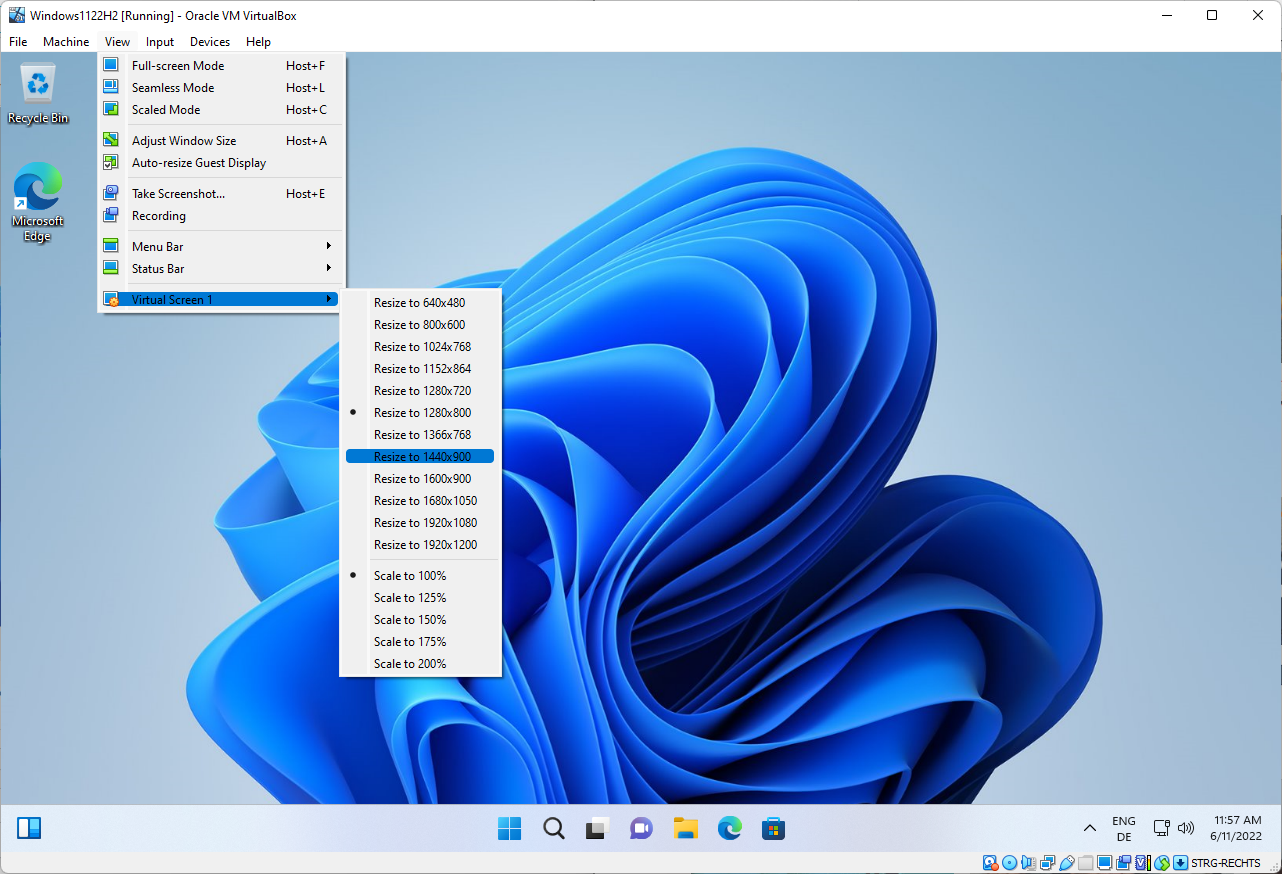
The physical display limits the available resolution; you can’t go beyond the maximum resolution that is supported by the display.
I have 2 virtual machines with the Guest Additions: one win 7 and one win 10.
In the first there is no “View” in the menu !
In the Win 10 machine, the resolutions are not grayed out but nothing happens when you click on them. On the other hand, the scale works.
Sorry, resolutions smaller than 1024×768 work, but larger resolutions don’t!
Is this article really written by Martin? Because it is full of mistakes (or misleanding information, at least).
1. “The description may sound as if you’d need to insert a CD image, but this is not the case.”
IT IS THE CASE. VirtualBox literally has an ISO image in its program folder, and by clicking “Insert Guest Additions CD image” it inserts that ISO image for you. Users can do it manually, especially if anyone want to download and test different versions of Guest Additions.
2. “VBoxWindowsAdditions is for 64-bit systems.” “VboxWindowsAdditions-amd64 is for AMD systems.”
Both statements are wrong/misleading. “VboxWindowsAdditions-amd64” is for 64-bit systems. It has nothing to do with AMD systems or AMD processors. “amd64” is just a term interchangeable with x64 (well, with very subtle diffrence that normal users can ignore). And “VBoxWindowsAdditions” (without suffix) is for both 32-bit and 64-bit systems. In fact, it is just an automatic selector (look at its tiny file size!). It automatically selects from -amd64 and -x86 based on the right architecture it detects. So:
– If the guest OS is 64-bit, use either “VBoxWindowsAdditions” or “VboxWindowsAdditions-amd64”.
– If the guest OS is 32-bit, use either “VBoxWindowsAdditions” or “VboxWindowsAdditions-x86”.
Come on Martin, you are much better than this…
As stated above, AMD64 does not refer to anything AMD-specific – it’s the term used for all 64-bit Windows. The term is used simply because AMD invented the 64-bit architecture used today by AMD and Intel. Yes, I know Intel invented one first, but it didn’t take off because it was incompatible with all previous Win32 software.
Please click on the following link to open the newsletter signup page: Ghacks Newsletter Sign up
Ghacks is a technology news blog that was founded in 2005 by Martin Brinkmann. It has since then become one of the most popular tech news sites on the Internet with five authors and regular contributions from freelance writers.